

How To Repair Fiberglass Boat Hull
Repairing your Fibreglass Hull
Author: Boat Accessories Australia Engagement Posted: 31 May 2022
If you own a fibreglass boat, you'll know there's potential risks of damage to the hull, be it from a rogue wave while trailering, grounding, knocking a jetty or even dropping a tool. The gelcoat will take the burden of the impact but in more serious cases the underlying fibreglass tin end up with some pretty nasty gouges. Ageing fibreglass tin also exist susceptible to bang-up, crazing and blistering though with the right tools and a little know-how, you can get them patched upwards and have your boat looking great over again.
Fibreglass Boat Materials
Most fibreglass boats are made using multiple layers of reinforced fabric and core materials held together with a polyester resin. The fibreglass is protected beneath a layer of gelcoat that'southward around 12 to 22 mm thick and acts as a wet barrier while also providing a smooth, glossy end. Repair jobs needed on fibreglass boats are ordinarily cosmetic, just if yous recall a cleft goes through the laminate due to constant flexing for example, you may need to have a professional boat repairer have a look at it.
What you will Need for the Task
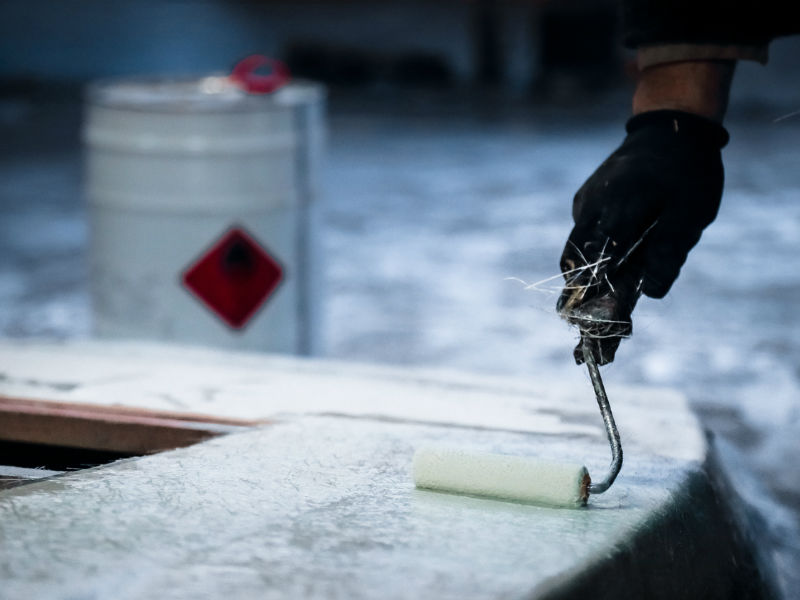
Products needed to complete a gelcoat repair include cleaner, gelcoat repair filler, hardener, painters masking record, rag or paper, acetone, sandpaper, gloves, putty knife, a cup and stirrer for mixing, buffing compound and wax.
For fibreglass, yous volition demand a fibreglass repair kit that usually consists of fibreglass matting, an MEKP hardener, brushes, polyester resin and a set of gloves. Yous will too demand acetone and putty filler.
The bulk of the links below are to Septone manufactured products and they also make a fibreglass repair kit. These products are also useful if you need to patch up surfboards, water skis, kayaks and plywood boats. 3M as well manufactures quality gelcoat repair and protection products.
Step by Footstep Instructions - Gelcoat Repair
-
Remove whatsoever contaminants on the surface like wax, oil or grease with a hull cleaner.
-
Clean whatsoever ragged edges of a gouge using a hand-held grinder. If y'all're repairing cracks, use a sharp V-shaped tool to scrape to the lesser of the cracks and remove the damaged material. Remove any loose particles.
-
Apply a 100-dust sandpaper to remove whatsoever pocket-size bumps and ridges earlier cleaning with acetone.
-
Tape off the damaged surface area using painters tape but exit a i centimetre margin. Cover with a rag or newspaper any parts of the boat not being repaired in instance of product spills.
-
Mix a batch of gelcoat repair filler then add hardener (included with the gelcoat repair filler) following the manufacturer's instructions. Mix thoroughly so the batch cures at the same time.
-
Use a putty knife to spread the gelcoat repair filler over the damaged expanse making sure y'all have plenty production to cover the harm and to sand back. Yous should accept ten to 15 minutes before the gelcoat hardens.
-
Once the product is completely hard, wet-sand the area using a 320-grit moisture/dry newspaper with a sanding block to polish the edges and flatten any bulges to make it even with the existing gelcoat. Finish off with a 1,000-grit paper.
-
Vitrify out any imperfections with fibreglass buffing compound then finish with a wax.
Step past Stride Instructions - Fibreglass
-
Set the surface with a wax and grease remover to ensure all dirt, grease oil and contaminants are removed. Let dry completely so cut away damaged area and whatever loose pieces.
-
Sand the surface with eighty-dust sandpaper to remove all primer, paint, rust or gelcoat. Sand 2-5cm across damaged area and downwardly to bare metallic or fibreglass. Repair both sides of the damaged area if possible for added strength. Depress or slightly bend the edges inward. Remove all grit created from sanding with a dry out cloth or compressed air, then re-make clean the surface with acetone.
-
Using the Fibreglass Repair Kit, cutting the fibreglass matt to the required size and permit an extra centimeter around the edges. On tight curves tear the mat to fit, adding actress pieces if needed. Put the mat on a clean surface such equally newspaper until it's ready for use.
-
Mix no more than resin than what y'all can utilize in 30 minutes, 250ml of resin will cover approximately 0.25m² of fibreglass matting.
-
Mix the resin thoroughly with the Septone MEKP catalyst (included in the Fibreglass Repair Kit): For 50ml resin on a cold twenty-four hour period, employ 40 drops of catalyst. For 50ml of resin on a hot solar day, apply xx drops of goad.
-
Castor a glaze of mixed resin on the damaged area extending 5-10cm beyond the repair. Place the first layer of fibreglass matt onto the mixed resin then in a dabbing movement utilize the paintbrush to saturate the matt and remove any air pockets. Continue applying additional layers of matting and mixed resin as needed while the kickoff application is notwithstanding sticky and wet. If the surface dries hard and is no longer sticky, sand with lxxx-grit sandpaper before applying additional layers of mixed resin and matting. Follow the same procedure if both sides are beingness repaired.
-
Allow expanse to cure, approximately ii hours at effectually 23-34°C. Curing will take longer at cold temperatures. Once cured, sand repaired surface area with dry out 80-grit sandpaper. Clean surface area with acetone.
-
To return the contour or to polish out depression areas in the surface, utilise a layer of Eazefill Putty with hardener thoroughly and apply a sparse layer of filler to the repair surface using firm pressure on the applicator to force the filler into all crevices and eliminate any air pockets. Gradually apply the remaining putty until it's slightly higher than the border of the repair.
-
Let twenty to 30 minutes for the putty to cure. Sand with 180-dust sandpaper. Ensure y'all plume the edges then re-clean with acetone.
-
Mask off the repair surface area in preparation of the primer coat. Apply Eazefill Putty over the repair surface area in thin layers, 3-to-iv coats. Go out v minutes dry out fourth dimension between each glaze. After the final coat exit to dry for 4 hours or overnight.
-
Remove all masking tape/newspaper and get-go sanding repaired surface area with wet and dry out 1200-grit sandpaper. Feather edges and sand until smoothen.
If you demand some advice on the best products for repairing the fibreglass on your boat, telephone call Boat Accessories Commonwealth of australia on 1300 308 161 or send united states an email.
Leave a annotate
Boat Accessories Australia is dedicated to keeping your details private. Any data nosotros collect in relation to you is kept strictly secured. We do not pass on or sell any of your personal details. We only use this information to identify and process your orders, provide you with our e-mail newsletter (if subscribed) and to personalise your shopping experience with us.
This Privacy Policy sets out:
- matters of which you lot should be enlightened regarding information we may collect about you
- our policies on the direction of personal data, and
- generally, what sort of data we concur, for what purposes, and how we collect, hold, use and disembalm that information
What personal information do we collect and store?
So that nosotros can provide services to you, we may ask for personal details such every bit your name, address, telephone number or e-mail service accost. Some examples of where nosotros may need these details are product orders, competitions and when you lot opt-in to receiving email newsletters from usa.
Privacy law requires us to collect personal data near y'all but from yous if information technology is reasonable and practical to practise then.
Boat Accessories Australia takes measures to ensure your personal information is protected from unauthorised admission, loss, misuse, disclosure or alteration.
More often than not, you accept no obligation to provide whatsoever information requested by us. If you choose to withhold requested information however, nosotros may non exist able to provide you with the goods and services that depend on the collection of that information, particularly if the collection of that data is required by law.
How is personal information used?
The personal data that we ask for is mostly used to provide goods or services to you. For example, for a debit/credit bill of fare transaction we demand your bill of fare number, and for a competition we need your contact details and then we tin contact you if you win.
We may besides use your personal information in other ways to provide yous with superior service. This may include using your personal data to advise you of new products and services. You lot have the correct to tell us that you do non want us to send information to yous other than for the main purpose for which we have nerveless your personal details.
Newsletter
We offer a regular email newsletter which contains new and on-sale products besides equally the latest boating news & advice. You may cancel your electronic mail subscription by following the elementary instructions at the bottom of each newsletter.
Cookies
Gunkhole Accessories Australia uses cookies to allow you to login to your account, maintain a shopping cart and to buy items in your shopping cart. Some cookies sent to your computer from Gunkhole Accessories Australia simply last while you lot're browsing our website, just several are persistent (they remain in your spider web browser unless you lot clear them). Cookies also let us to give yous a more personalised shopping feel past displaying products that interest y'all throughout our product pages, thus providing yous with a more friendly, interesting and enjoyable shopping experience.
Your IP address
Whenever yous use our web site, or whatsoever other web site, the reckoner on which the spider web pages are stored (the Web server) needs to know the network address of your computer so that it can transport the requested web pages to your Cyberspace browser. The unique network address of your computer is called its "IP accost," and is sent automatically each fourth dimension you lot access any Internet site. From a calculator's IP address, it is possible to make up one's mind the general geographic location of that computer, but otherwise it is anonymous.
We do go on a record of the IP addresses from which customers access our site in some cases, such as where you have specifically provided usa with information nearly yourself, in which example we also tape your IP address for security purposes. Another instance of where we record your IP accost would be when proceeding to a checkout to finalise an order. After placing the gild, your IP address will be stored forth with a transaction number that allows us to rail your order.
More data
More information about Australian privacy laws and the National Privacy Principles is available from the Role of the Australian Data Commissioner at http://world wide web.oaic.gov.au
Source: https://www.boataccessoriesaustralia.com.au/blog/our-blog/repairing-your-fibreglass-hull/
0 Response to "How To Repair Fiberglass Boat Hull"
Post a Comment